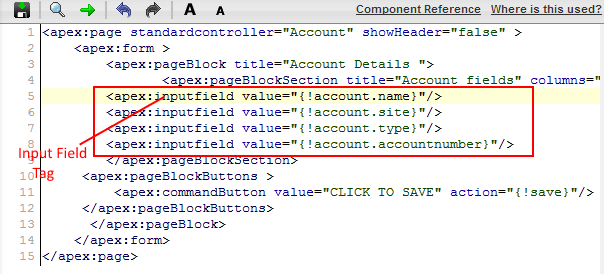
apex:inputfield tag : In our previous Salesforce Tutorial we have clearly learned about visualforce <apex:outputlink> tag . In this Salesforce Training Tutorial we are going to learn about <apex:inputfield> tag and how it works when used in visualforce page.
Visualforce apex:inputfield tag
<apex:inputfield> :- Inputfield tag is used to insert salesforce objects like standard objects and custom objects. E:- If we want to insert standard object Contact details, we used <apexinputfield value=”{!account.name}”>. Here we are inserting Account name field which is required field. <apex:inputfield> tag automatically makes that field as required in visualforce page.
Different attributes supported by <apex:inputfield> tag.
| id | label | onblur | onclick |
| onchange | ondbclick | onfocus | onkeydown |
| onkeypress | onkeyup | onmousedown | onmousemove |
| onmouseout | onmouseover | onmouseup | onselect |
| rendered | required | style | stylecClass |
| tabordehint | value |
Let us See how< apex:inputfield> tag works.
Here we are creating a form to create new account in salesforce.com. Every VF page must be started with <apex:page>.
- standardcontroller=“Account” means we are using standard object “Account” as a controller.
- ShowHeader=”false” helps not to display Headers and sidebar.
- In <apex:form> tag only we have to write pageblock, pageblocksection and input fields.
- To save the user defined input values Save button is used.
- Click on Save button.
apex:inputfield tag Output.

