Salesforce Lightning Flow builder collects data and allows Salesforce system administrators to perform various actions like building forms, add business logic, and perform data queries and data manipulations and perform actions in your Salesforce organization or external system using drag and drop widgets without using a single line of code.
In this Salesforce Lightning tutorial, we will learn about Lightning Flow, how to build a screen flow, how to build an autolaunched flow, how to manage a flow and Lightning flow limitations and considerations.
Lightning Flow Builder in Salesforce
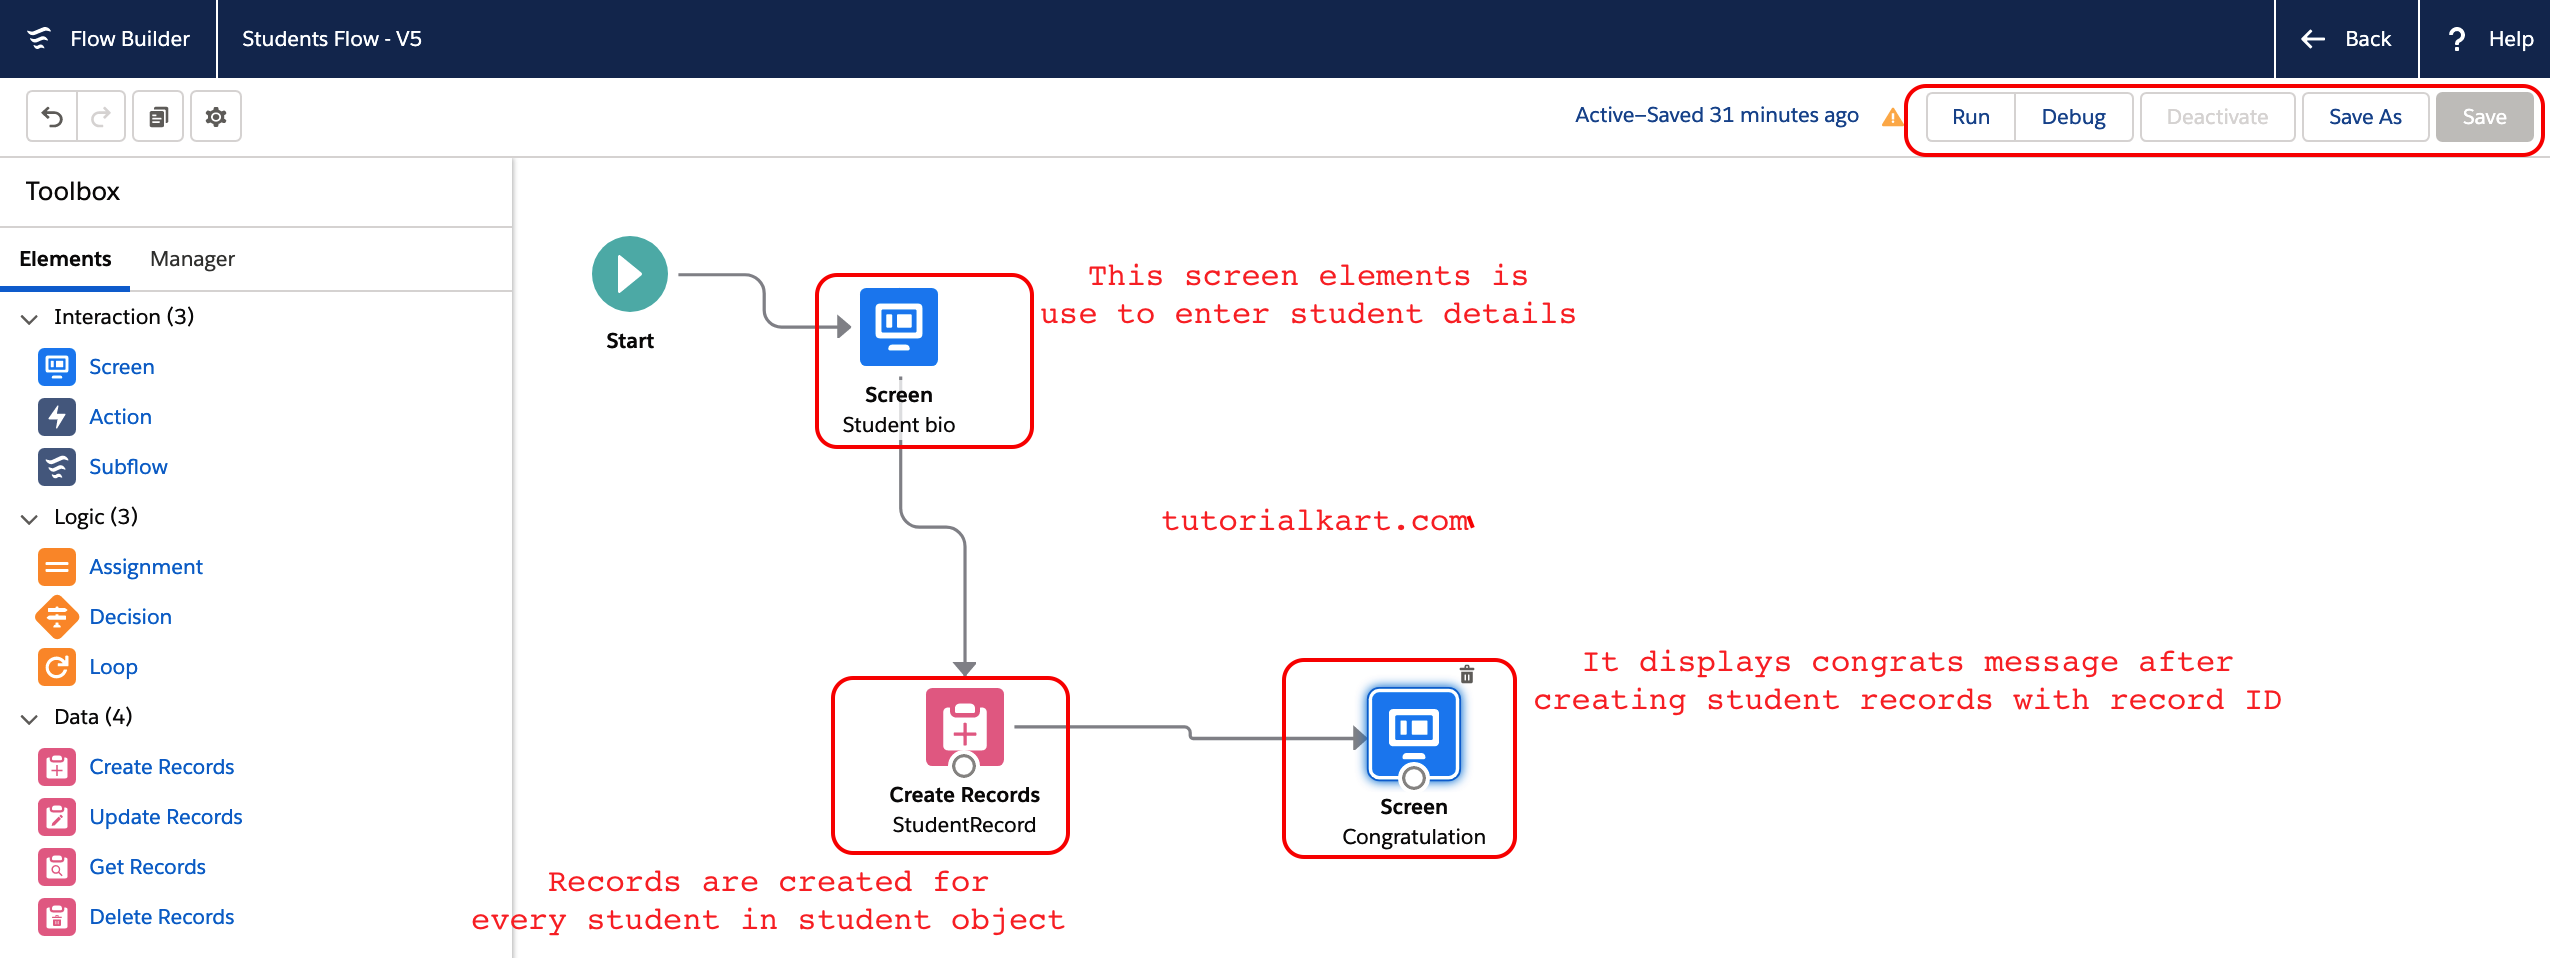
Lightning Flow in Salesforce is an application that guides users through screens that collect and displays information, creates and updates Salesforce records, and executes logic based on user input. The Cloud Flow Designer is a point-and-click tool for building Flows. The Cloud Flow Designer typically looks like this.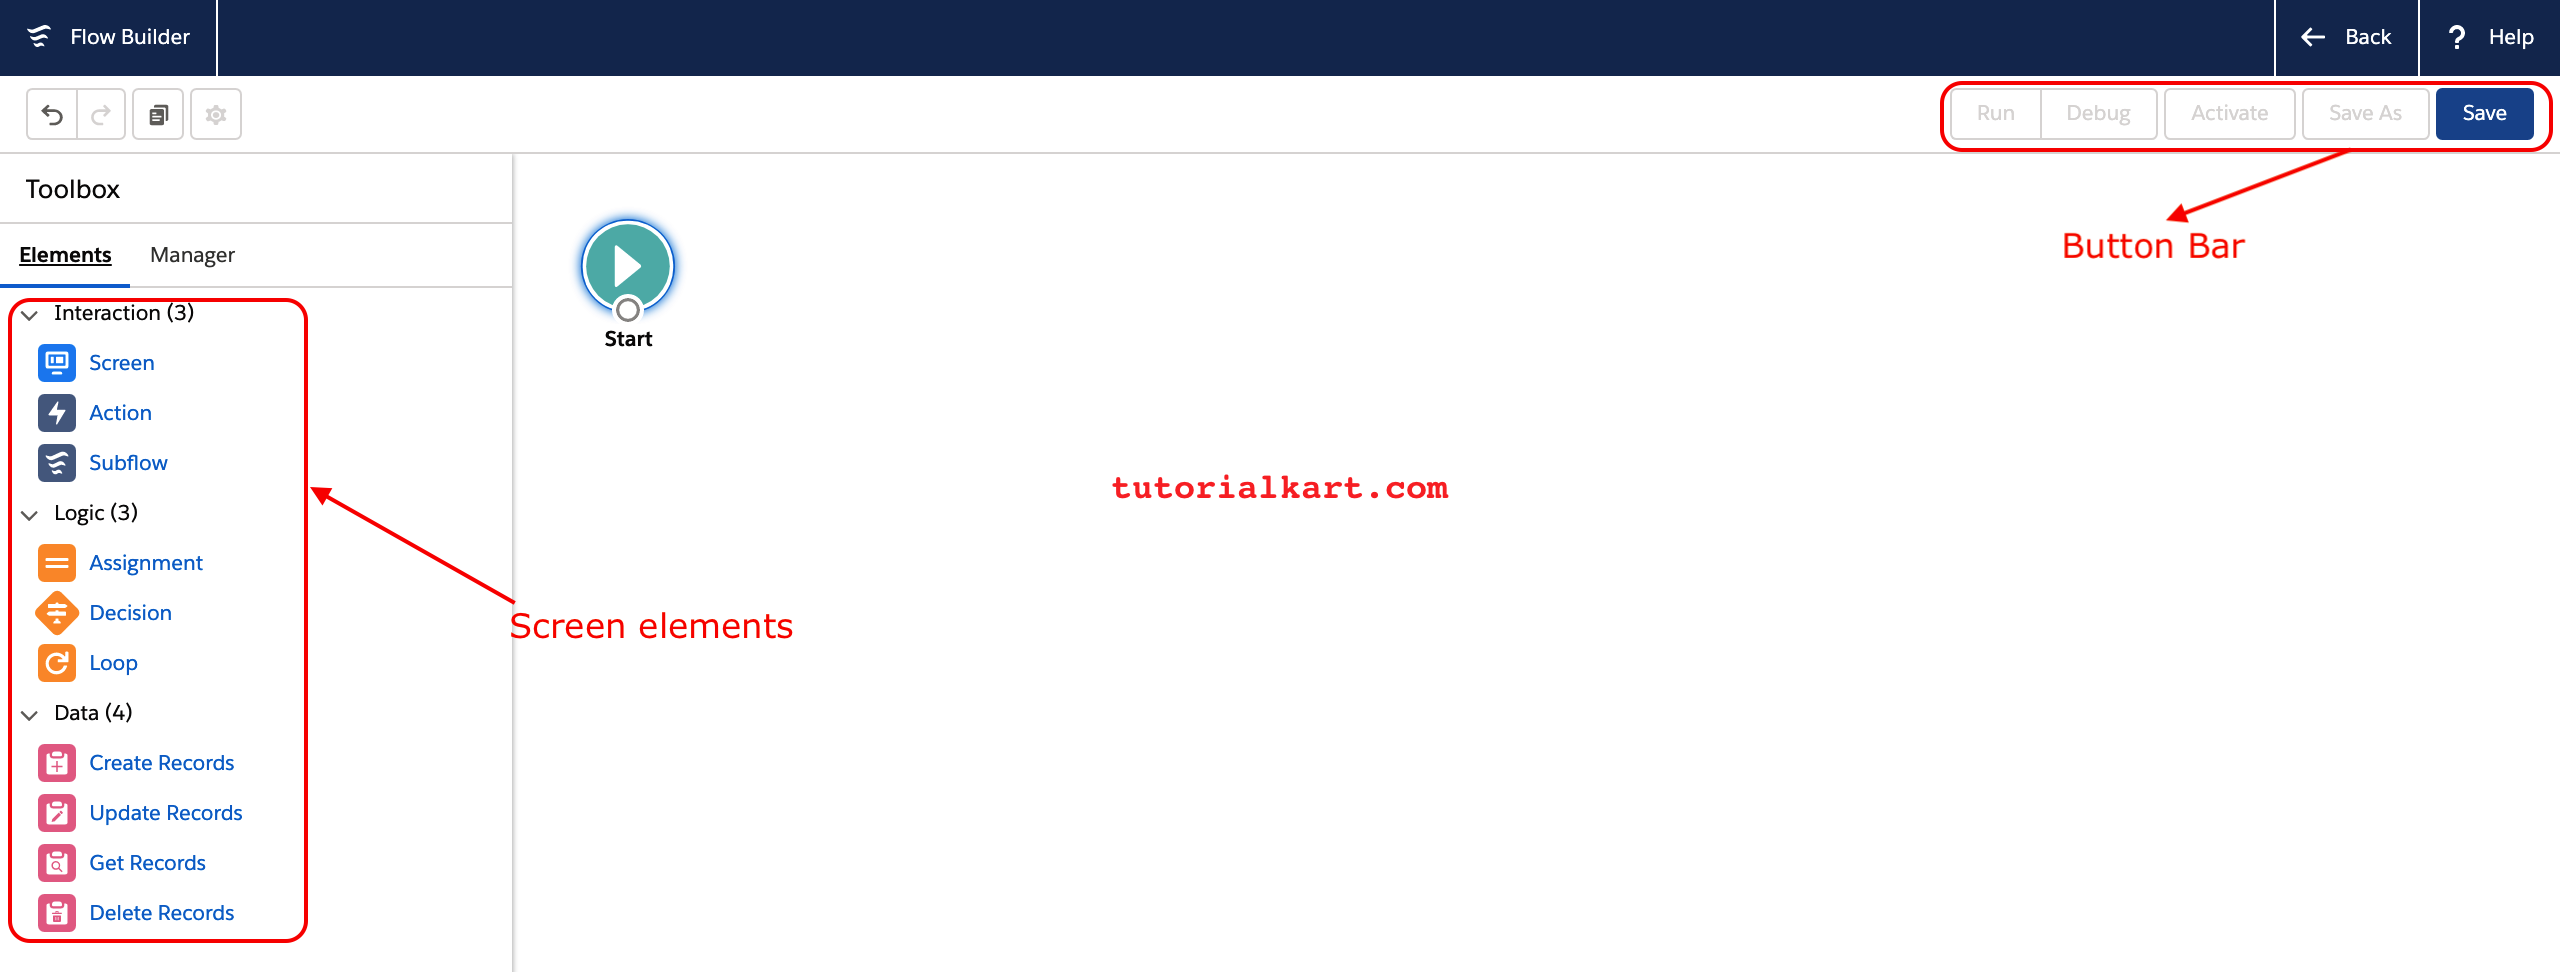
Screen elements in the Lightning flow allow us to use input and output Lighting components. Button bar here we’ll have some button save as, run, debug, Active, and Save as shown above.
To create a flow in the Salesforce Lightning flow builder, we will use different components like flow elements, connectors, and Resources. Salesforce provides two types of flows they are screen flows and auto launched flows. Let us start creating a Lighting flow withe example.
Let’s go to setup again. Search for Flow under the process automation. You find Flows click on new Flow. I am going to the screen components and select screen element. Now hold it drag and drop to the canvas. Immediately, it is asking well what is the name of the screen. And add screen components to the screen as shown below. We have used Text field for Student name, Picklist for Student Gender, Text for Student Group and Currency for Student Fee in Screen1.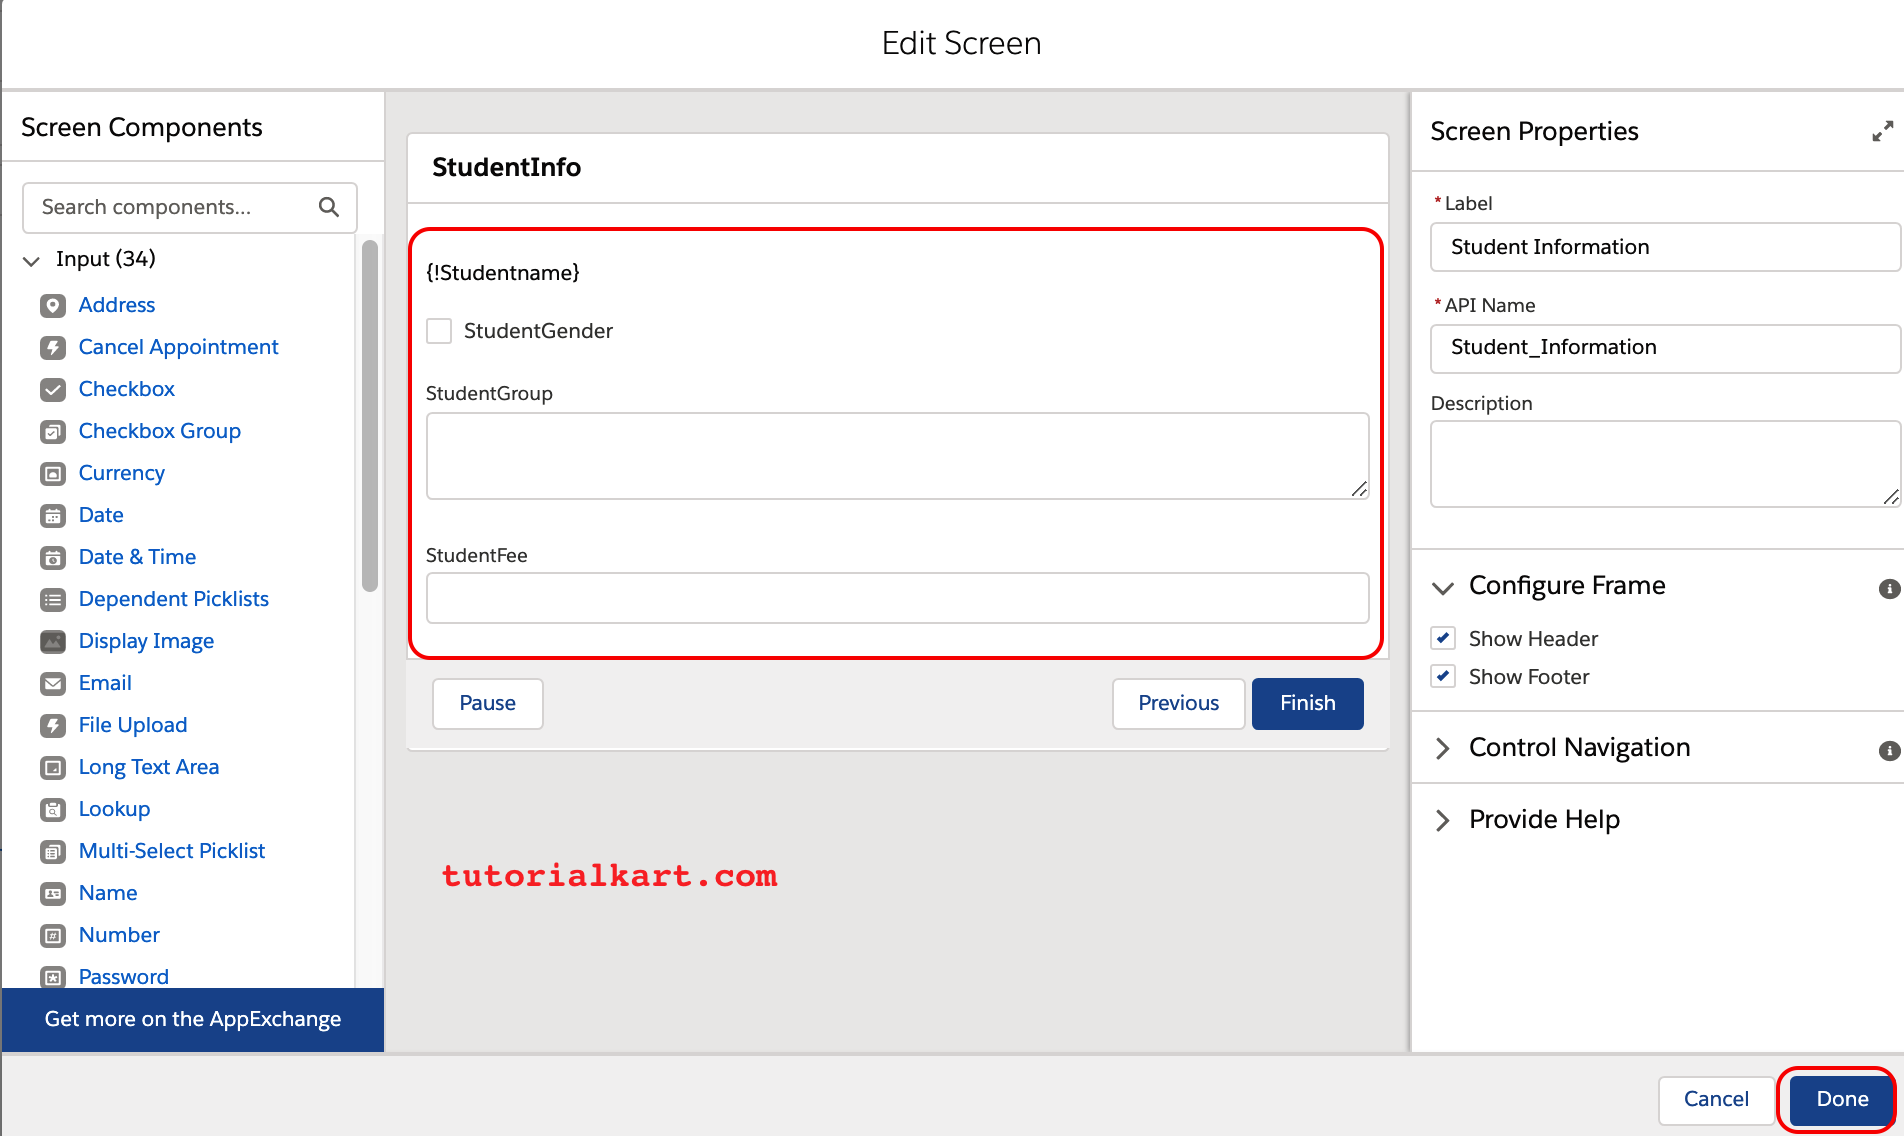
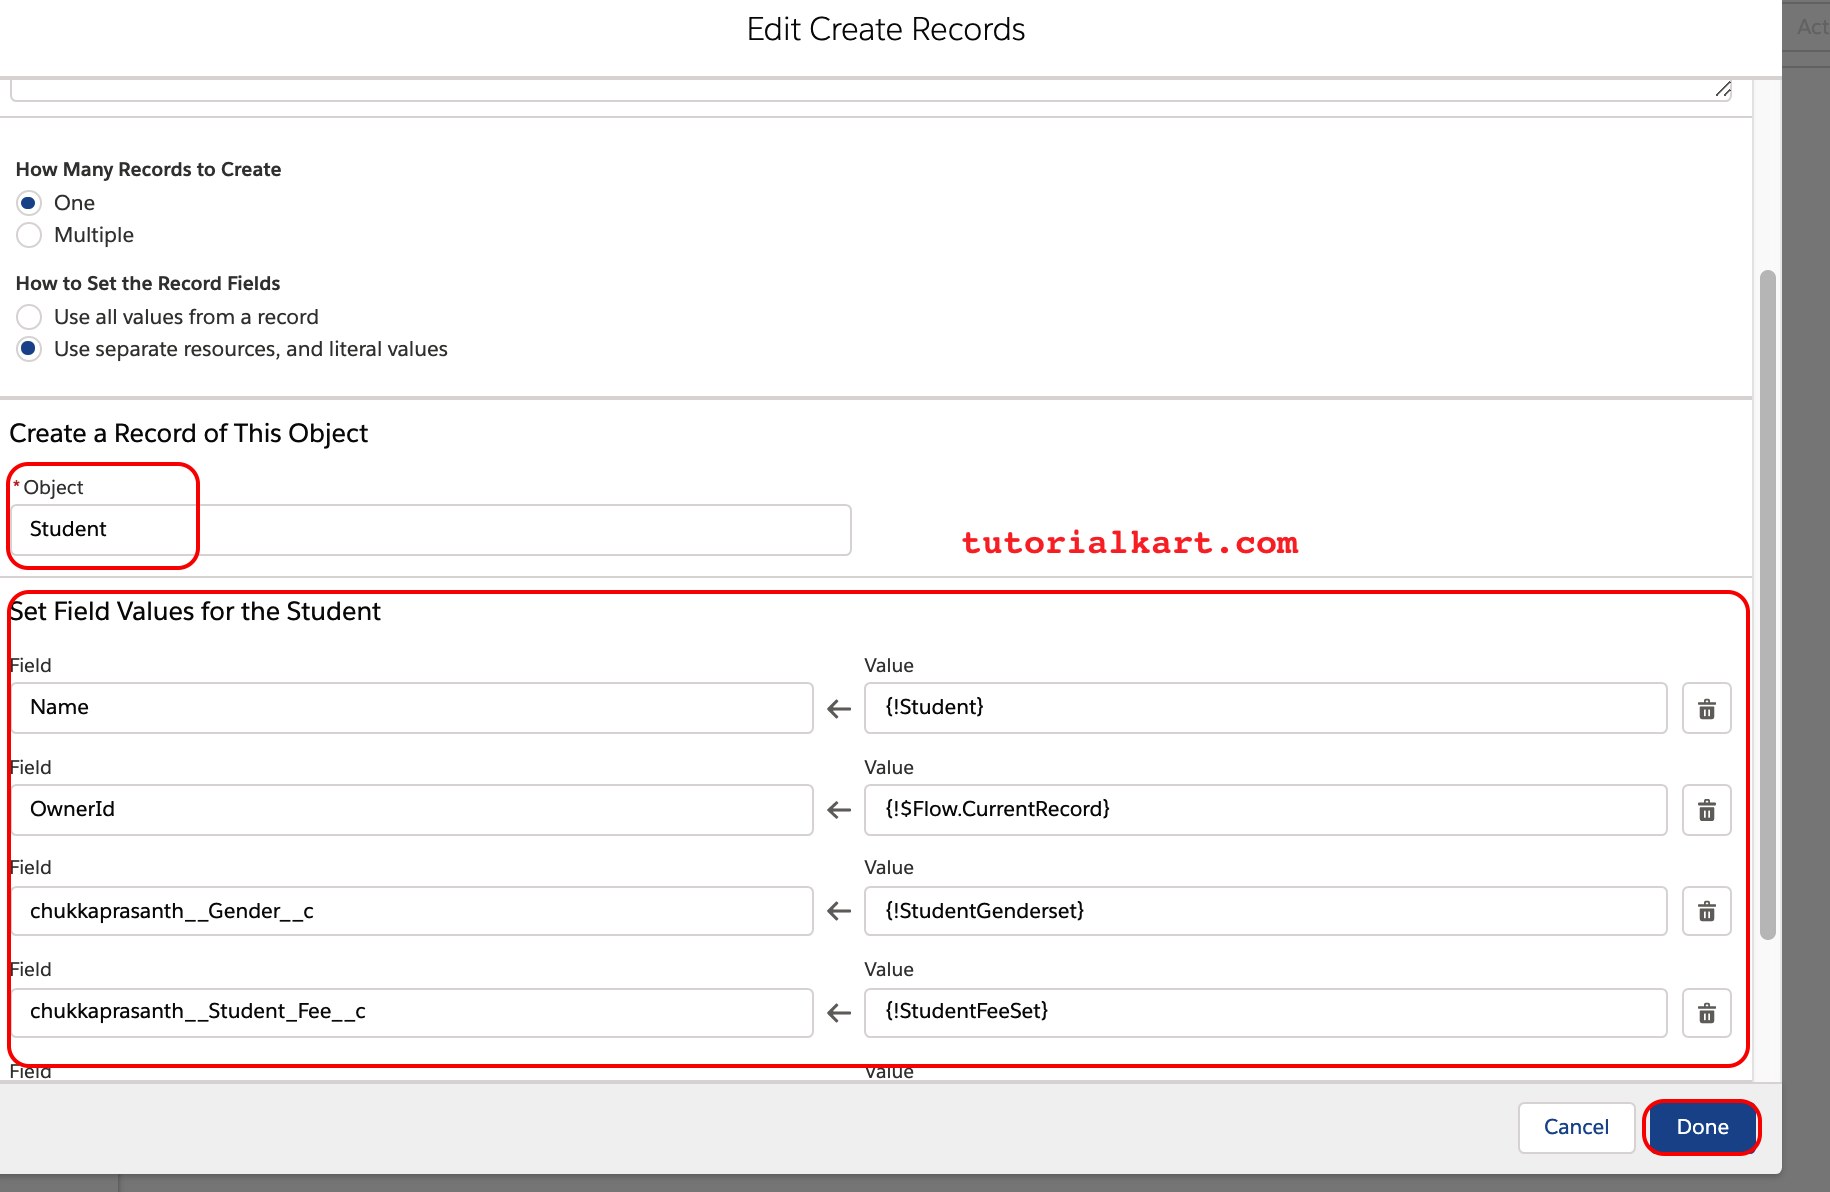
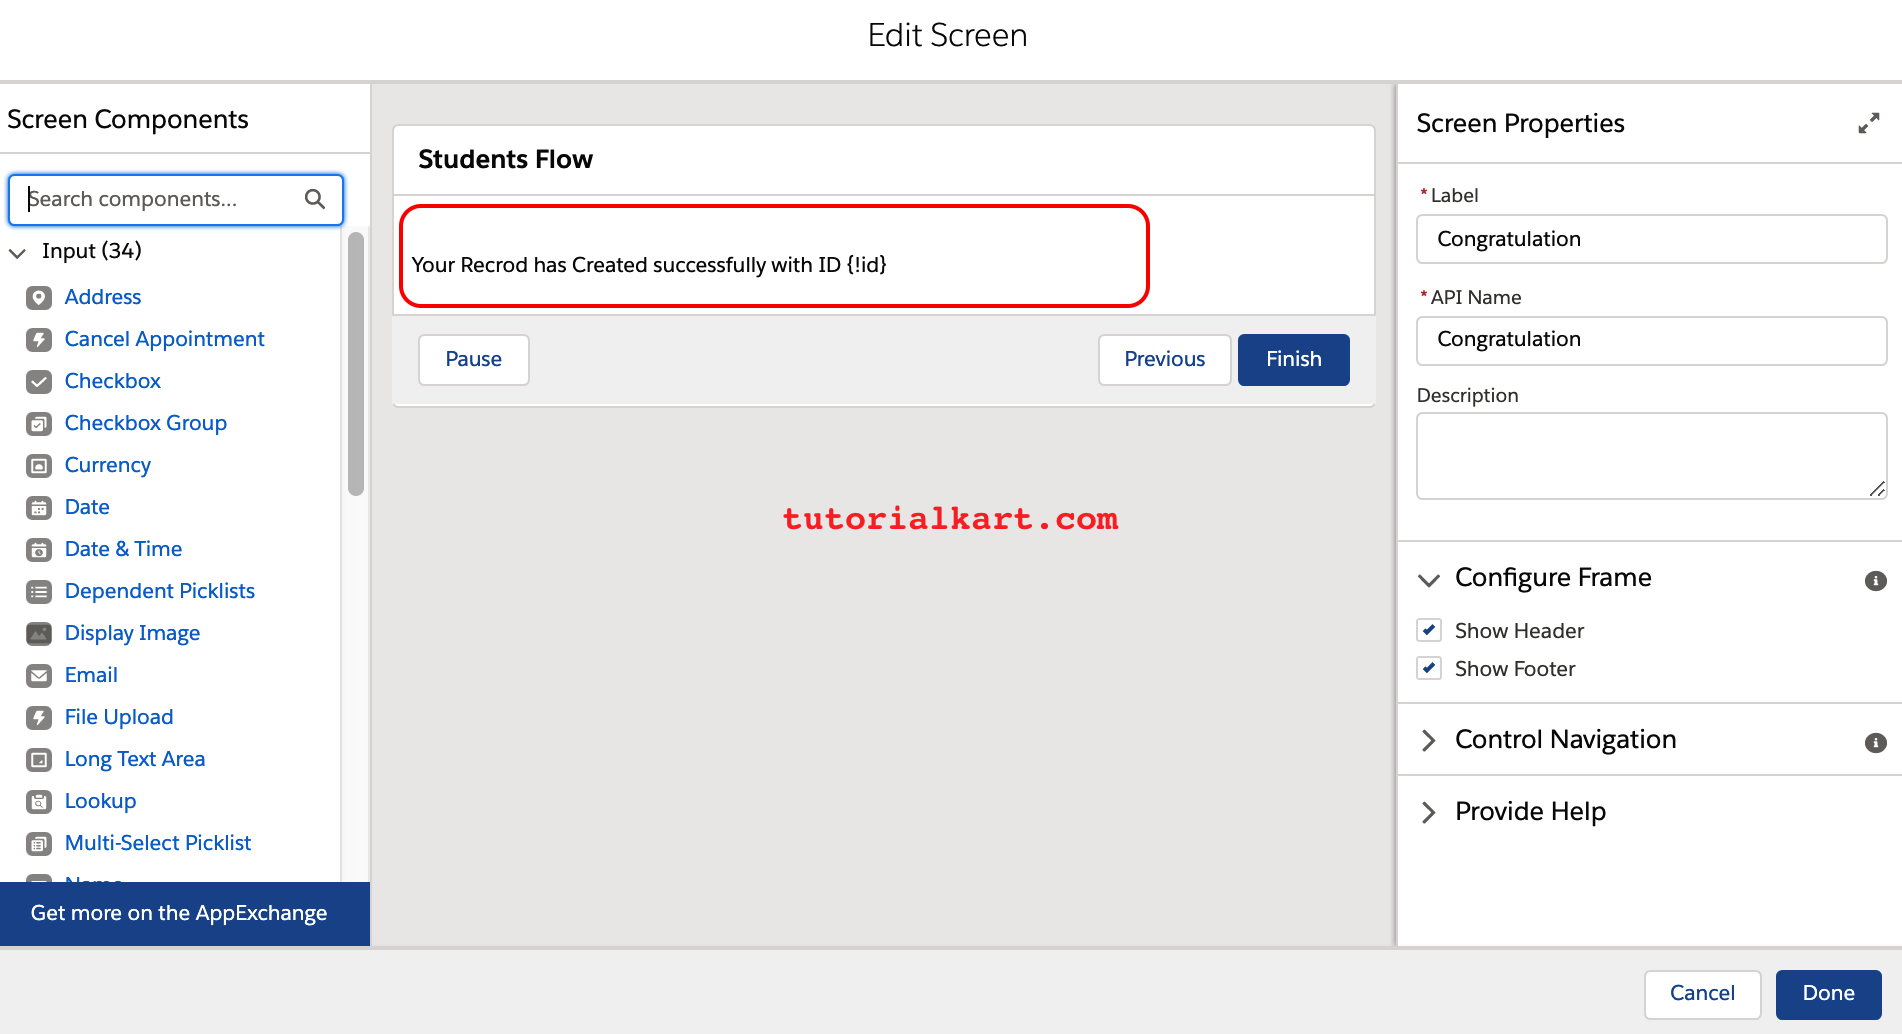
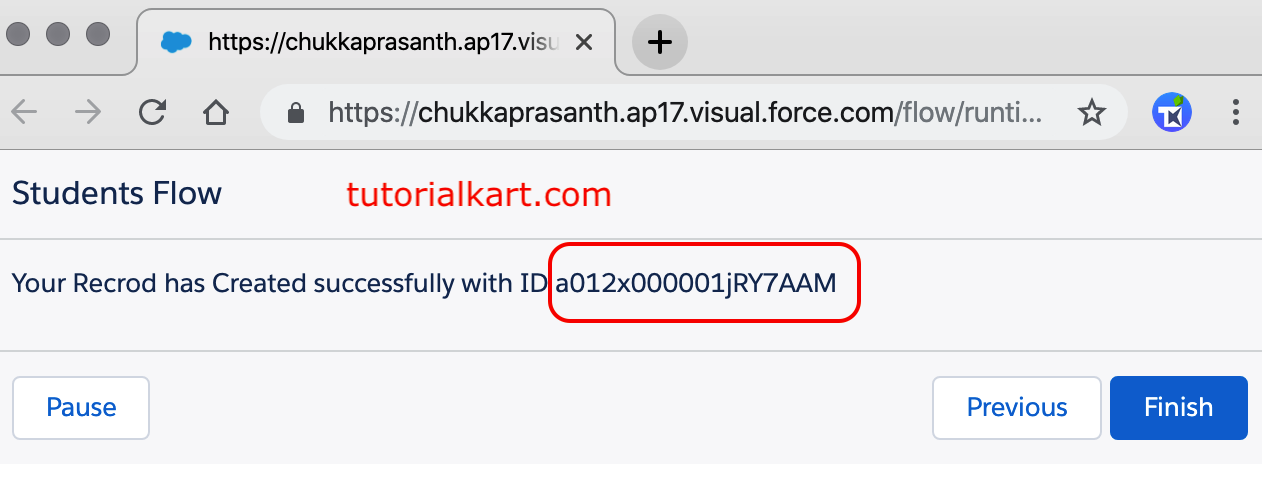
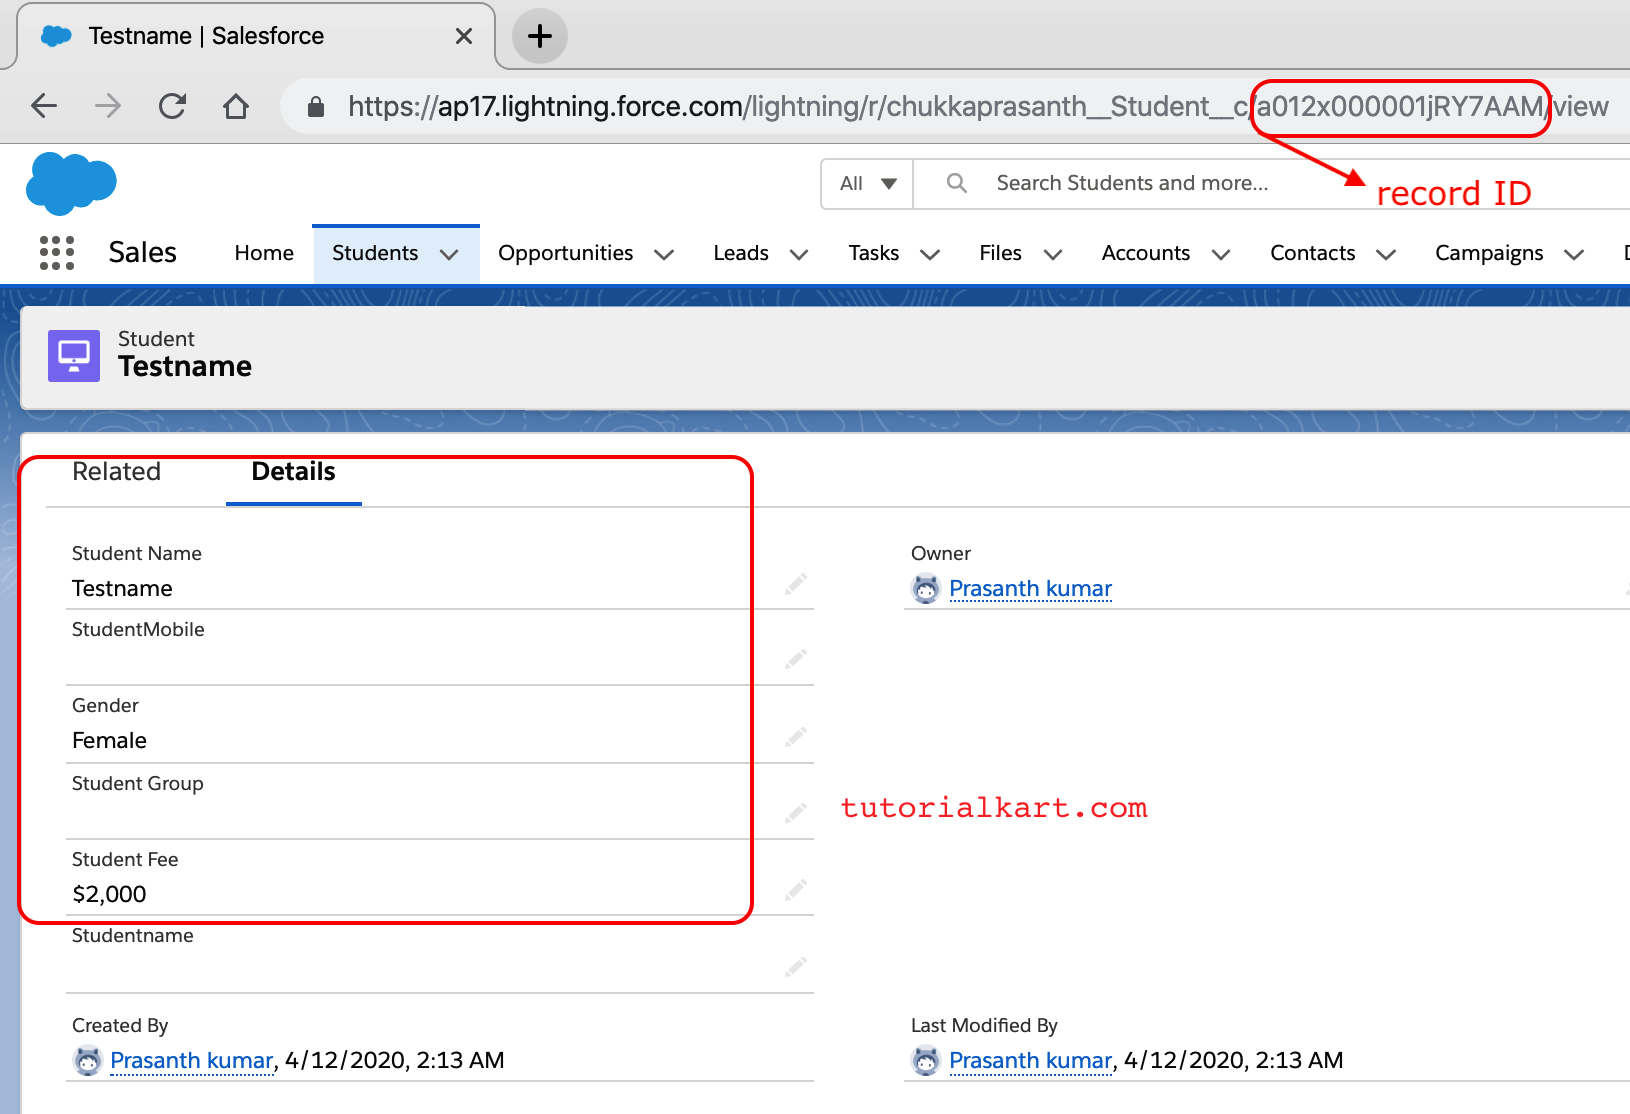
Output
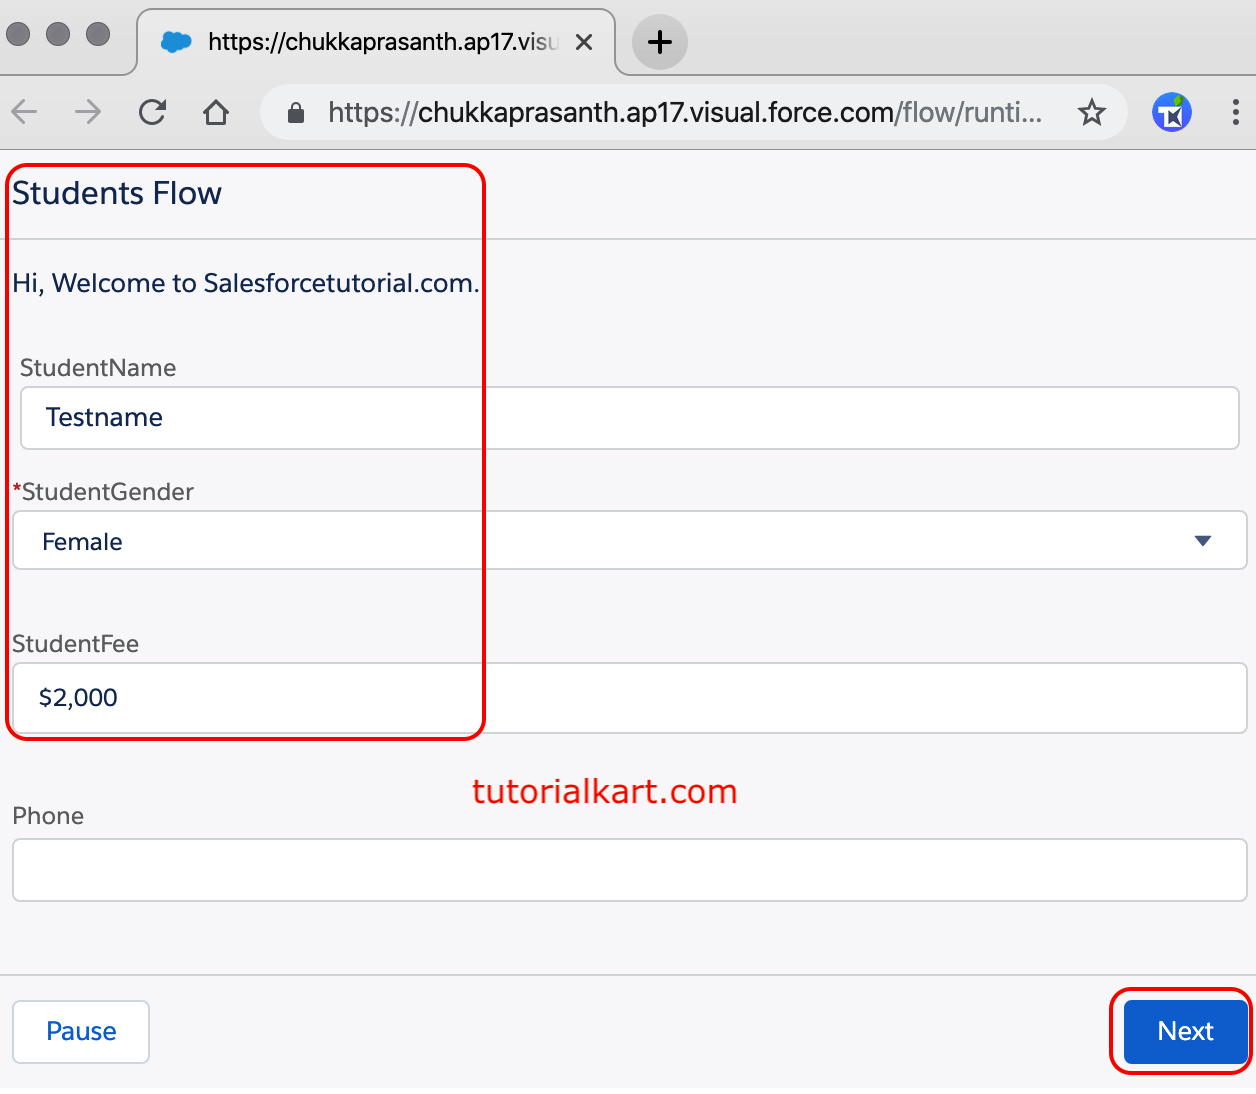
Let us check the lightning screen flow working. Now click on run button and enter all the details as shown below.
