In this Salesforce tutorial, we are going to take a look at switching between Salesforce Classic and Salesforce Lightning Experience as well as from Salesforce Lightning Experience to the Salesforce Classic using the Switcher.
Switching from Salesforce Lightning Experience to Salesforce Classic
In the latest Salesforce Developer account, every user account is automatically pre-enabled with the Lightning Experience. How can we say that Salesforce Lightning Experience is pre-enabled?
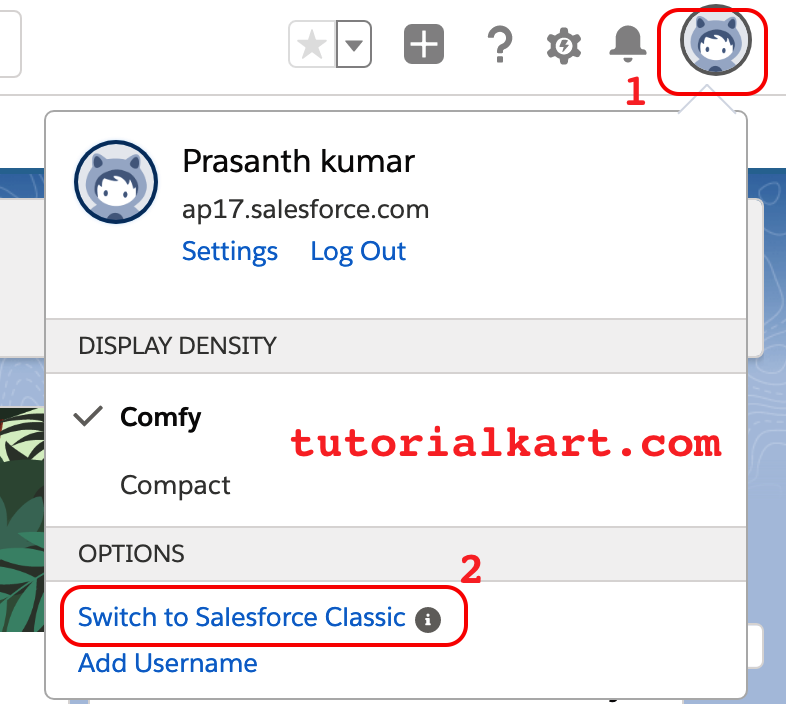
To check let us go to the username button which is at the top-right corner I have a Switcher here saying switch to Salesforce Classic. It means I mean Lightning Experience. 
This is called a Switcher. Click on Switch to Salesforce Classic. Now observe in the browser URL you are finding home slash home dot JSP. 
So, it is Salesforce Classic and in the username button, you find the switch to Lightning Experience as shown above. This is the Switcher to Lightning Experience. Okay, by clicking here again we can go to Lightning Experience. We have to note that the Salesforce editions from summer 16 onwards are already enabled with Lightning Experience and whatever the licenses before that means predated to the Lightning Experience. We have to make great two Lightning Experience using Lightning Experience migration assistant. 
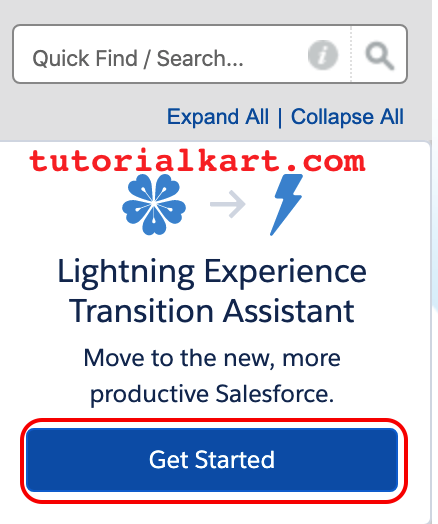
I will show you that we are in Salesforce Classic as of now and once I click the setup I find Lightning Experience migration assistant as shown above. So, by clicking on get started, 
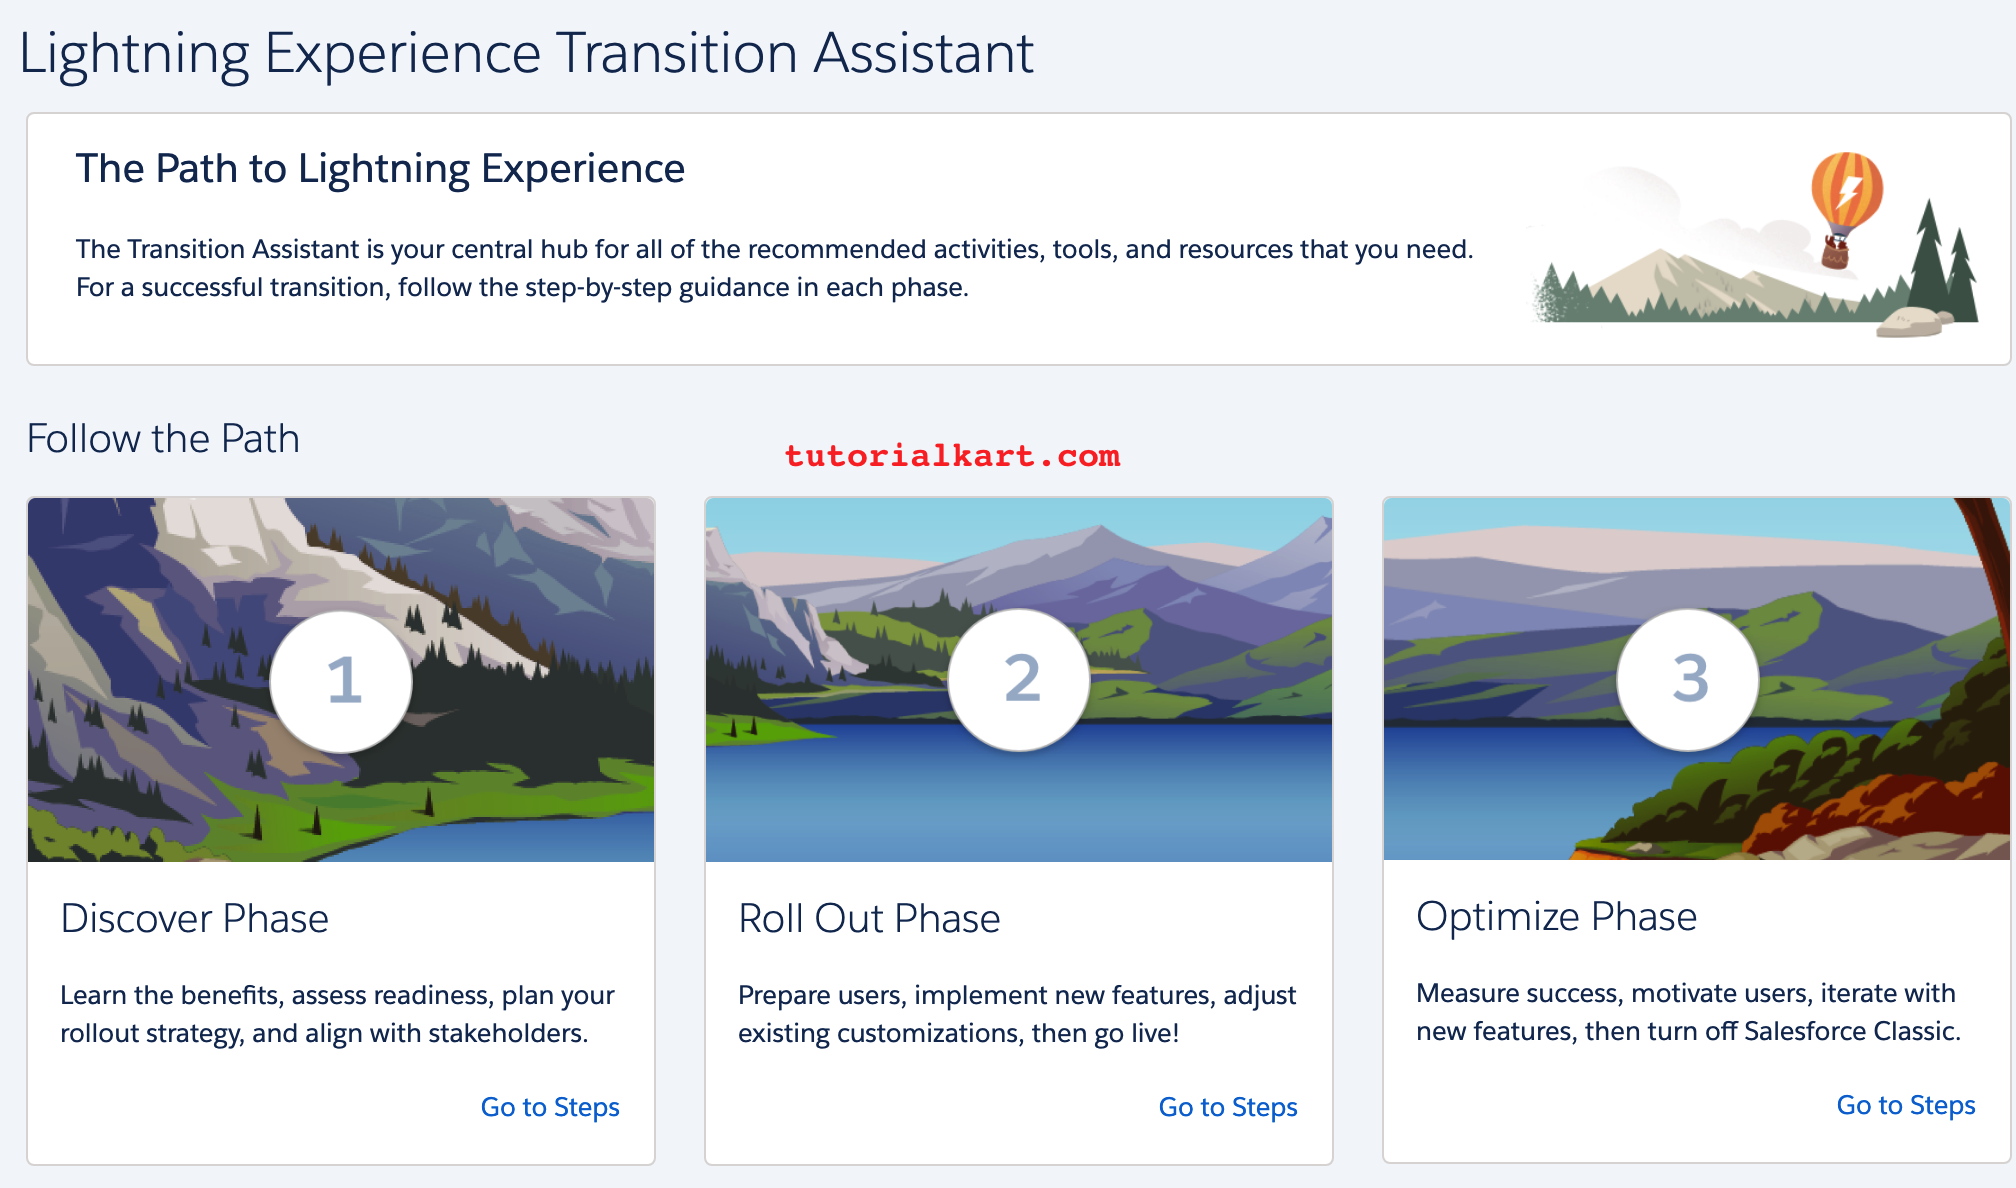
For a successful transition, follow the step-by-step guidance in each 3 phases shown above and finally, Lightning Experience is enabled.
Conclusion
In this Salesforce tutorial, we have learned about switching between Salesforce Lightning experience to Salesforce Classic. In our next tutorial, we elaborately discuss about Salesforce migration process.