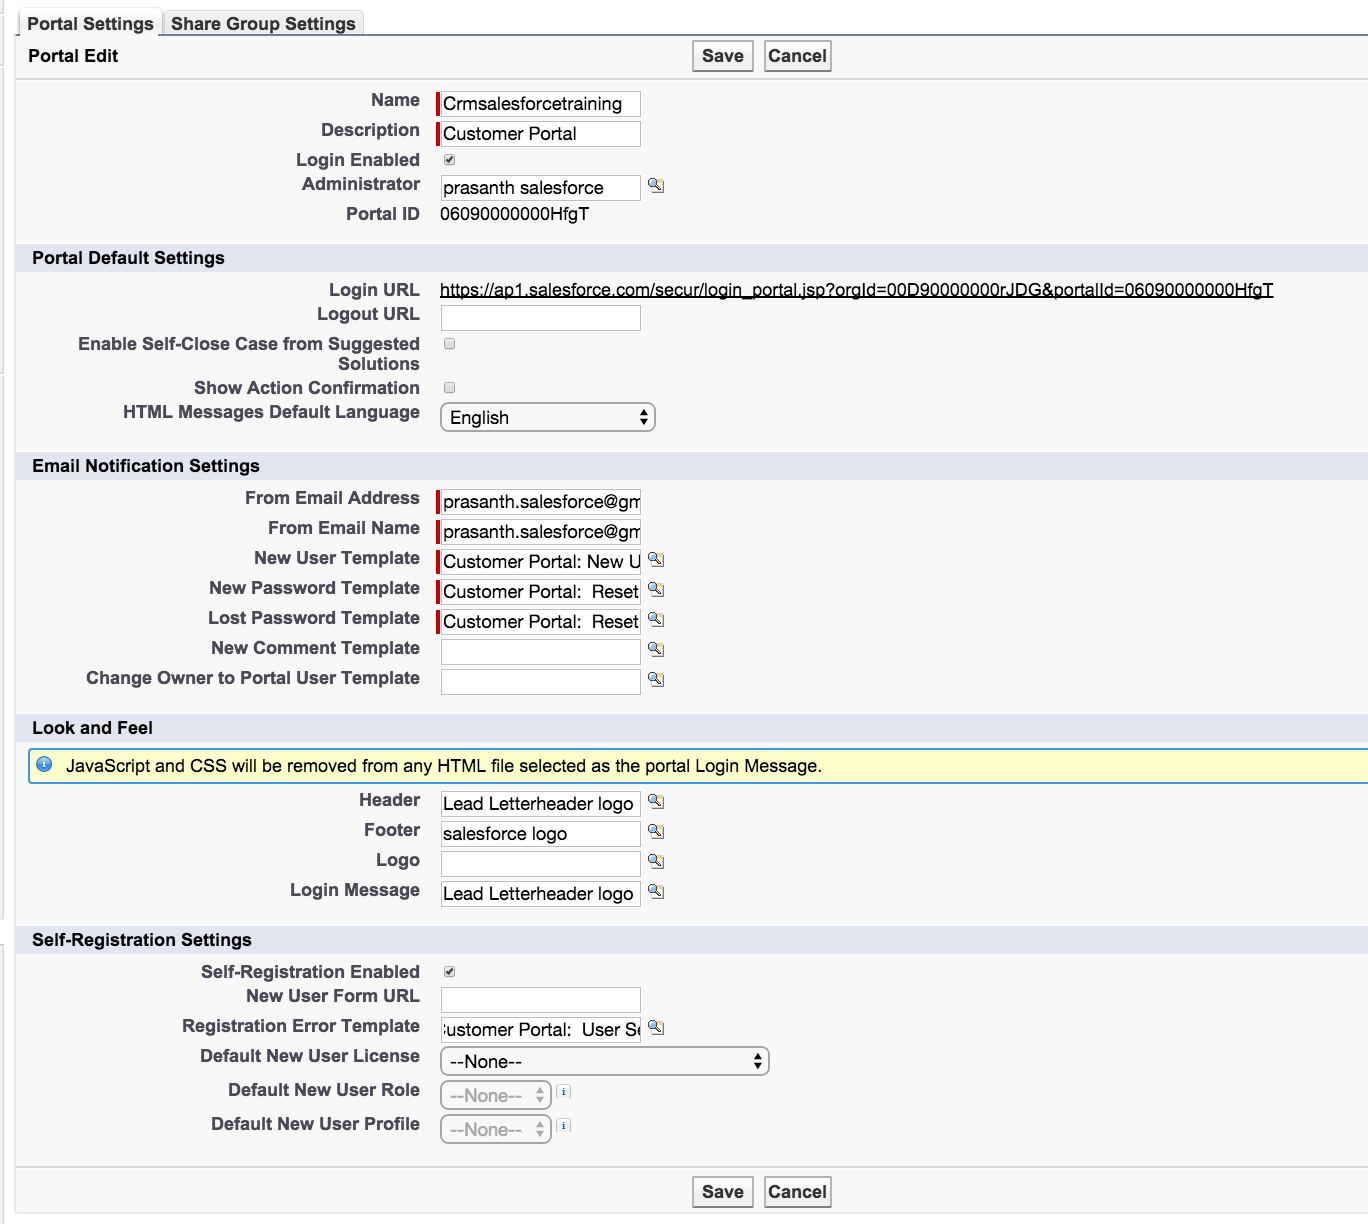
Enabling salesforce customer portal login and Settings : In Salesforce customer portal enabling customer portal login is the second step. Salesforce users who are working with customer portal has to enable customer portal login page, customer portal settings. In this salesforce tutorial we learn about salesforce customer portal login page examples.
Why should we enable salesforce customer portal login ?
Salesforce customer portal login settings are made to set different default settings, email notification settings, look and feel settings, self registration settings.
Enabling salesforce customer portal login and Settings
In the process of Enabling customer portal login and Settings we have two types of settings they are.
- Portal Settings.
- Share Group Settings.

Portal Settings.
In portal Settings we will make different settings and configuration in the following.
- Portal default settings.
- Email notification settings.
- Look and feel settings.
- Self registration settings.
By Enabling salesforce customer portal login and Settings the following are the settings that we make.
Portal Settings.
- Enter name.
- Description.
- Make sure to check login enabled check box.
- Add administrator by clicking on lookup window.
- Leave portal default settings as it is.
Email notification settings.
- Enter your email Address.
- Enter your name.
- Select any email template from the lookup window.
- Select new password template from the lookup window.
- Select lost password template.
- Select comment template.
Look and Feel
In look and feel section we have to add footers, headers and login messages that are displayed to users.
Self Registration Settings.
This section enables us to allow existing contacts to register automatically to access customer portal in salesforce.
- Select Self registration enabled check box to activate.
- New user from Url : This makes us to allow web-to-lead, web-to-case forms for self registration.
- Registration Error Template : This is the email that will be sent to user whose registration is failed through web-to-lead, web-to-case forms.
Finally click on Save button.