Web to Case Forms in Salesforce : In our previous Salesforce Tutorials we have learned about Salesforce Sandboxes. In this Salesforce Training Tutorials we are going to learn about Salesforce Web to case forms, How to create web to case forms, what is a web to case form.
What is a Web to Case Form?
Web to case forms are used to gather customers requests directly from company or organization website. Web to Case forms are similar to Web to lead Forms. By using web to case forms we can generate 50, 000 cases per day automatically.
- When Web to Case form is submitted salesforce.com runs field validation rules before creating any record.
- Rich text Area fields are not used in Web to Case forms because Rich Text Area fields are not supported by salesforce.com for web to case forms.
Creating Salesforce Web to Case Forms
Now we are going to create web to case forms in salesforce.com. Follow steps shown below.
1.1 Enable Web-to-Case
- Navigate to Setup:
- Click on the Gear icon at the top right corner of the Salesforce interface.
- Select Setup from the dropdown menu.
- Find Web-to-Case Settings:
- In the Quick Find box on the left, type Web-to-Case.
- Click on Web-to-Case under Feature Settings > Service > Web-to-Case.
- Enable Web-to-Case:
- Click Edit.
- Check the box labeled Enable Web-to-Case.
- If desired, check Require reCAPTCHA Verification to prevent spam submissions.
- Click Save.
Generate Web-to-Case HTML Form
- Access the HTML Generator:
- On the Web-to-Case page, click on Web-to-Case HTML Generator.
- Select Fields for the Form:
- Choose the fields you want customers to fill out. Common fields include:
- Contact Name
- Phone
- Subject
- Description
- Choose the fields you want customers to fill out. Common fields include:
- Specify Return URL:
- In the Return URL field, enter the URL of the page you want customers to be redirected to after submitting the form (e.g., a thank-you page on your website).
- Generate the HTML Code:
- Click Generate.
- Copy the generated HTML code displayed in the text area.
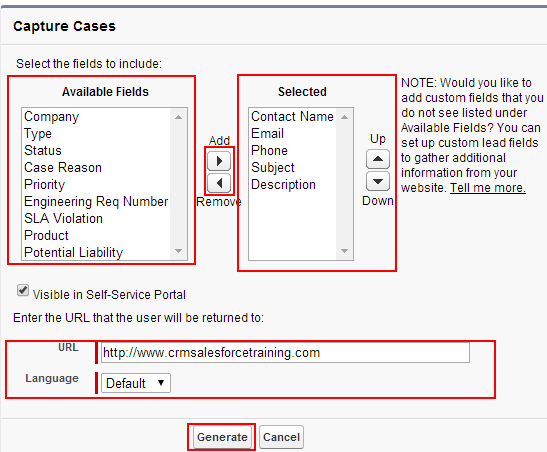
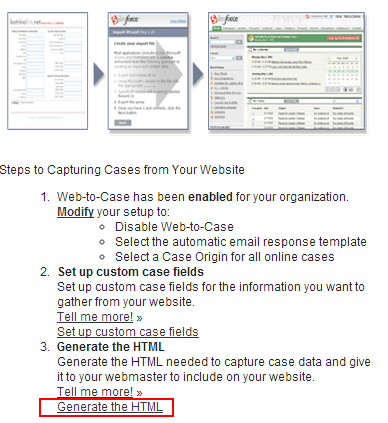
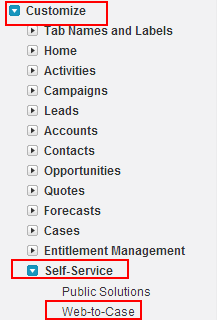
Go to Setup=>Customize=>Self-Service=>Web-to-Case. Now a window will be opened. From above Screenshot we are having different steps to capture cases from our website. Click on Generate the Html link as shown above. Select the fields from Available fields to Selected fields section. Fields in the selected fields sections are displayed in the Web to Case form.
- Select Visible in Self-Service portal check box.
- Enter the URL to which the user wants to redirect after submitting Web to Case Form.
- Select language to default.
- Click on Generate button.
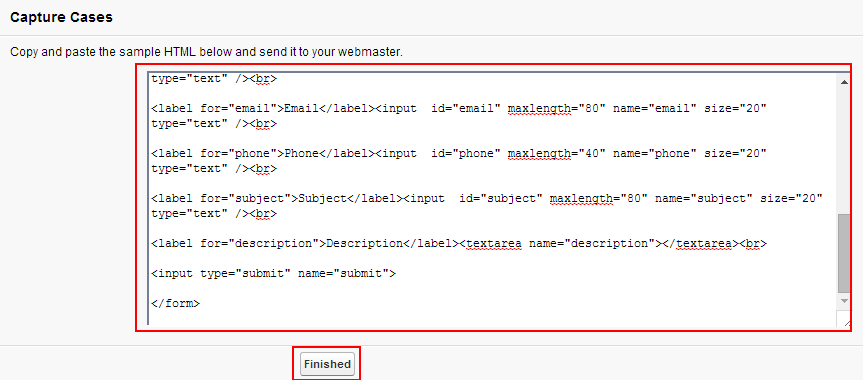
- Copy an paste the code in notepad and save it with .html extension.
- Click on Finished.
Now go to the code and open with any browser.
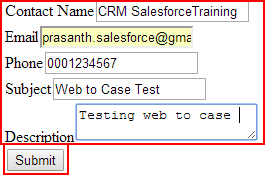
- Enter Contact name.
- Email address.
- phone number.
- Subject and description.
- Finally select Submit button.
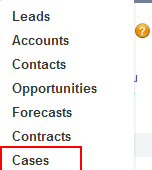
Now go to Cases Tab.
In recent cases section we will observe the case with case number and subject.

Open the Case as shown above.
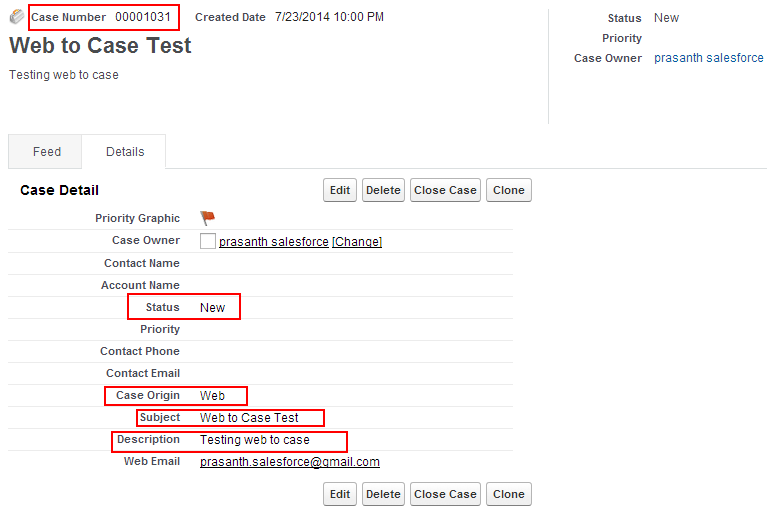
Observe all the details. These are the details where we have given in Web to lead form.

Automatically an email will be sent to the customer with all case details as shown above.
