Creating the Role Hierarchy in salesforce : Before creating the role Hierarchy in salesforce we have to configure organization wide defaults settings. After organization wide defaults settings have been established we have to create Role Hierarchy settings in salesforce. Role Hierarchy settings make the managers and subordinates to edit, and view the records. The users in the Hierarchy can be able to view, edit and report all the data shared.
How Role Hierarchy Works?
Basic Structure
| Component | Description |
|---|---|
| Roles | Represent organizational levels (e.g., CEO, Manager, Sales Rep). |
| Users | Assigned to specific roles based on their position within the organization. |
Data Access Mechanics
| Mechanism | Description |
|---|---|
| Ownership-Based Access | Users can access records they own regardless of their role. |
| Inheritance | Users higher in the hierarchy automatically gain access to records owned by users in roles beneath them. |
| Manual Sharing | Administrators can grant additional access to records outside of the role hierarchy through sharing rules. |
Creating the Role Hierarchy in Salesforce?
| Step | Action |
|---|---|
| 1. Define Roles | – Navigate to Setup > Users > Roles. – Click Set Up Roles. – Use the Role Hierarchy Setup Wizard to create roles reflecting the organization’s structure. |
| 2. Assign Users to Roles | – Go to Setup > Users > Users. – Edit a user’s details and assign them to the appropriate role. |
| 3. Adjust OWD Settings | – Navigate to Setup > Security > Sharing Settings. – Set Organization-Wide Defaults for each object. |
| 4. Enable Hierarchy Access | – Ensure the “Grant Access Using Hierarchies” option is enabled for relevant objects. |
Go to Setup.
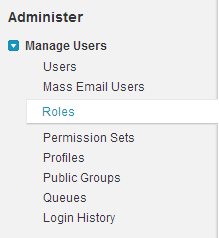
Now go to Administer=>Manage Users=> Roles.
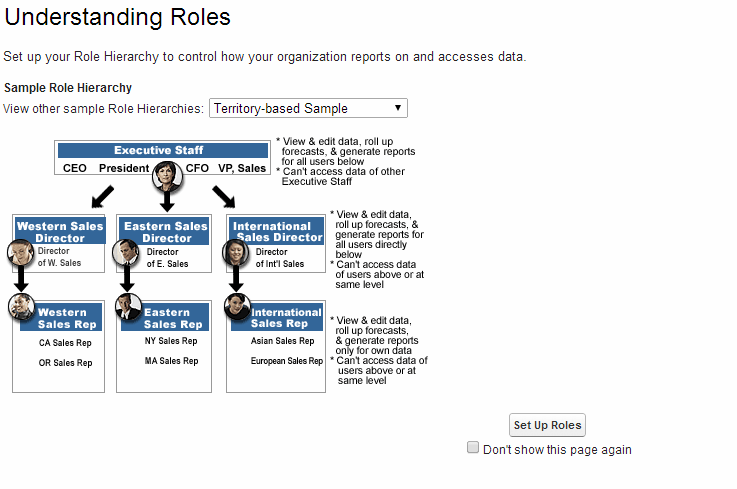
Now we are taken to new window select Sample Role Hierarchy from pickup List which is shown below.
Click Set Up Roles to create new Role in Salesforce.
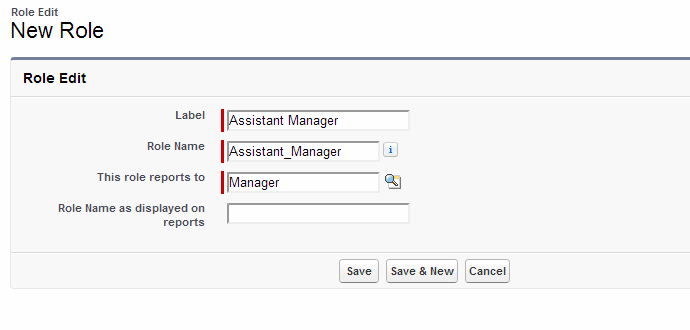
Enter Label Name, Role Name and select this role report to field from pick list. The name which we selected in role reports to will act as manager for the user which we are creating now in salesforce.
Select Save Button.
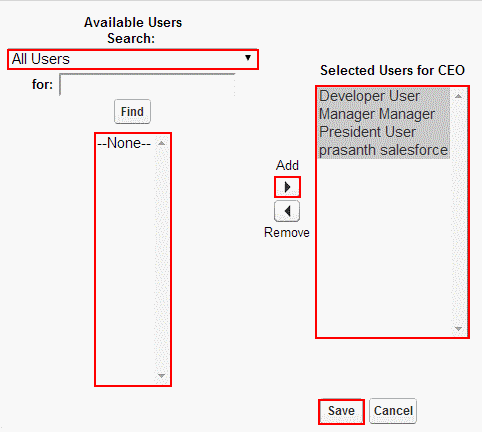
Now Go to Detailed view select Assign Users to Role. We have to assign users to the role we have created. The users which we assign will only access the data assigned to this role.
Select All Users from Pick list. Then all users that are available in our account will be displayed. Select users from Available users block and add to Selected Users.
Save Settings.
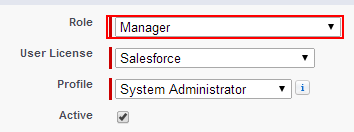
To check whether this role is assigned to user manager go to Manage Users=>Users. Select User manager and Edit it.
From above we observe that Role field is assigned as Manager.
The Role we created can be viewed in three modes.
- Show in Tree View.
- Show in Sorted List View.
- Show in List View.

